# Adding New Test Steps Group
To add a Test Step Group in a Test case, perform the following actions:
1. On the **Home** page, select the required project and select **Design Studio**.
2. Go to the **Test Case** tab and select the created Test case.
{% hint style="info" %}
To learn more about how to create a Folder and Test case in **Test case** page, [click here](https://docs.avoautomation.com/working-with-the-avo-assure-platform/create-and-execute-tests-with-design-studio/working-with-test-case-section/creating-test-case).
{% endhint %}
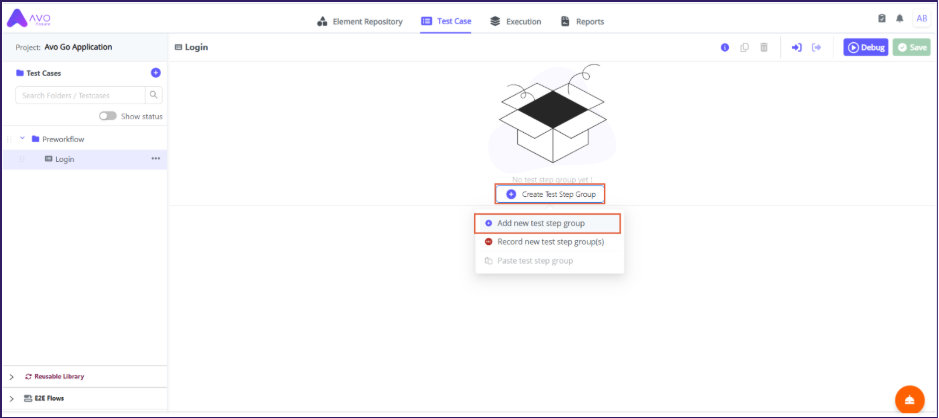
3. On the **Test Case** tab, select **Create Test Step Group** and select **Add new test step group**. The **Test Step Group** dialog opens.
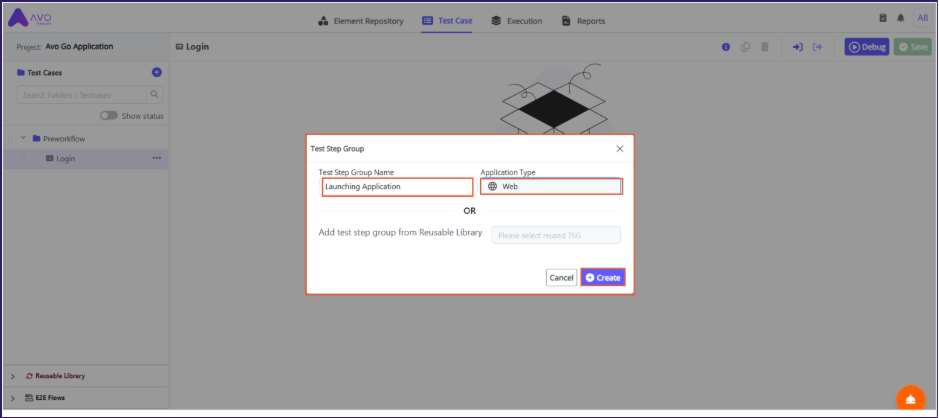
4. Enter the name in the **Test Step Group Name** text box and select the **Application Type**.
5. Select **Create** to add a new Test Step Group.
{% hint style="info" %}
**Note**: You can also add a **Test Step Group** from the [**Reusable Library**](https://docs.avoautomation.com/working-with-the-avo-assure-platform/create-and-execute-tests-with-design-studio/working-with-test-case-section/creating-test-step-group/add-test-step-group-from-reusable-library).
{% endhint %}
6. This creates a new Test Step Group inside the Test case.
7. Select the required options to add the Test Steps. \
Here are the two ways to add steps:
* **Add from repository**
* **Add Manually**
Add from repository
To add elements from the Element Repository to the Test Step Group, perform the following actions:
1. On the **Test Case** tab, select the created Test Step Group and select **Add from Repository**. The **Element Repository** page opens.
2. From the **Element Repository** page, drag-and-drop the captured elements into the **Test Step Group**.
{% hint style="info" %}
**Note**: Once you drag and drop the elements, the corresponding action automatically appears in the Test Steps.
{% endhint %}
3. Select **Save** to save the Test Steps.
{% hint style="info" %}
**Note:** After adding all elements to the **Test Step Group**, you can edit the steps.
{% endhint %}
Add Manually
To add elements manually to the Test Step Group, perform the following actions:
1. On the **Test Case** tab, select the created Test Step Group.
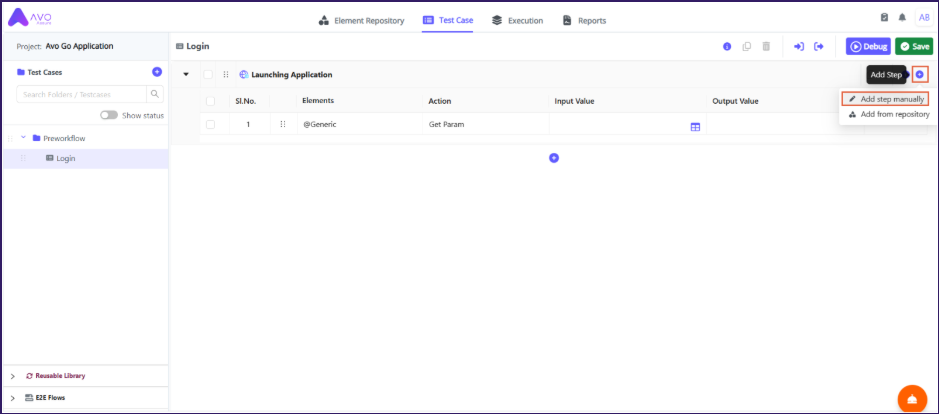
2. Select **Add Manually** to add a new Test Step.
3. Select **Add Step** (**+**) icon and select **Add step manually** to add more steps to the **Test Step Group**.
{% hint style="info" %}
**Note**: You can also add a Test Step manually by selecting the **Add Step** (**+**) icon for an individual step.
{% endhint %}
4. A new **Test Step** is created. Select the required **Element Type** and **Action** from the dropdown.
5. Select **Save** to save the Test Steps.
{% hint style="info" %}
**Note**: To run the created Test Steps, you can either select **Debug** or create an [**Execution List**](https://docs.avoautomation.com/working-with-the-avo-assure-platform/create-and-execute-tests-with-design-studio/working-with-execution-section/execute-execution-list).
{% endhint %}