# Pulling Data from Bitbucket Repository
## Pull Method in Avo Assure
The Pull method in Avo Assure is used to bring test artifacts from the Bitbucket repository back to Avo Assure. Use the Pull method in the following cases:
* To access Avo Assure test artifacts (such as Element Repository, Test Cases, Data Tables, or Execution Lists) that were already stored in Bitbucket.
* To set up Avo Assure on a new machine or environment and download existing (previously pushed) Avo Assure test artifacts in new machine from Bitbucket.
### Pulling Test cases from Bitbucket Repository
From Avo Assure, the following test artifact data can be pull from Bitbucket Repository:
* Element Repository
* Test Case
* Data Table
* Execution List
{% hint style="info" %}
**Note**: The steps remain the same for all artifacts. Navigate to the respective artifact page, select the required data or parent folder, and push it to Bitbucket.
{% endhint %}
To pull Test cases from Bitbucket Repository, perform the following actions:
1. On the **Home** page, under **Projects**, select the required **Project**.
2. Select **Design** Studio. Select the **Test Case** tab and locate the Bitbucket icon.
3. Select the **Bitbucket** icon and select **Push** method.
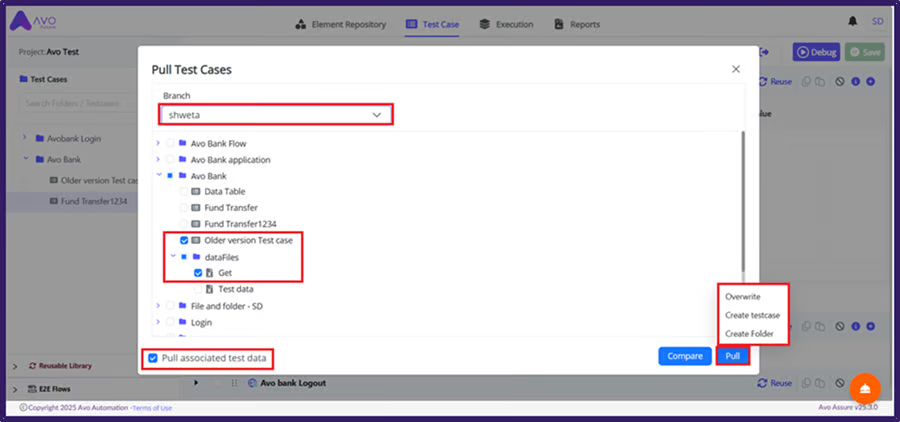
4. Search **Branch** and select appropriate Folder.
5. Select **Pull** button, then you can see three options:
* **Overwrite**: When the **Overwrite** option is selected, the system restores the previous version of the Test case to the current folder.
* **Create testcase**: When the **Create testcase** option is selected, the system creates new Test case inside the folder.
* **Create Folder**: When the **Create Folder** option is selected, the system creates a new folder in the Test Case page and pulls all data into the newly created folder.
6. You can pull Test case using the following options:
Overwrite
To pull Test case by selecting **Create Folder** option, perform the following actions:
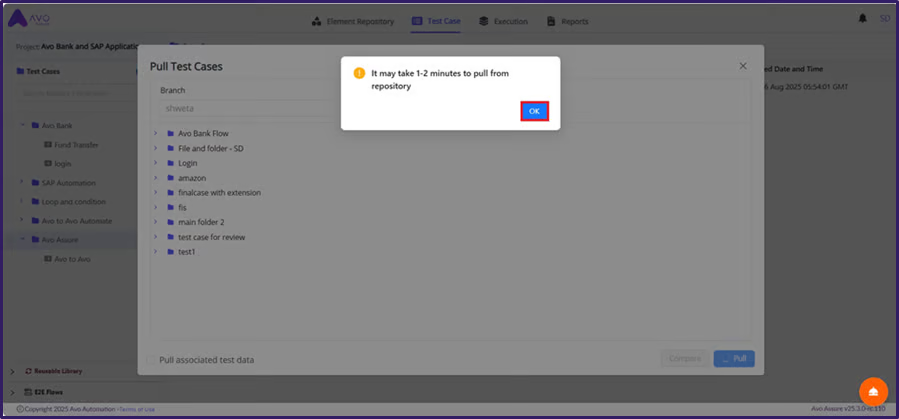
1. A dialog box appears with the message: **It may take 1–2 minutes to pull from repository.**
2. Select **OK** button to proceed.
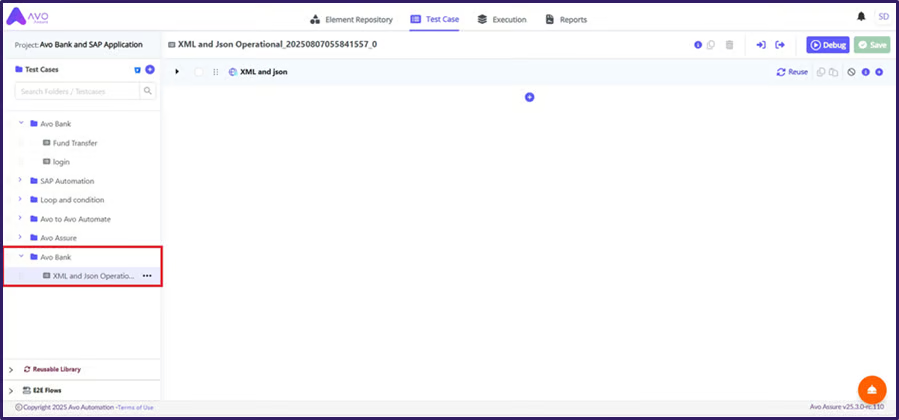
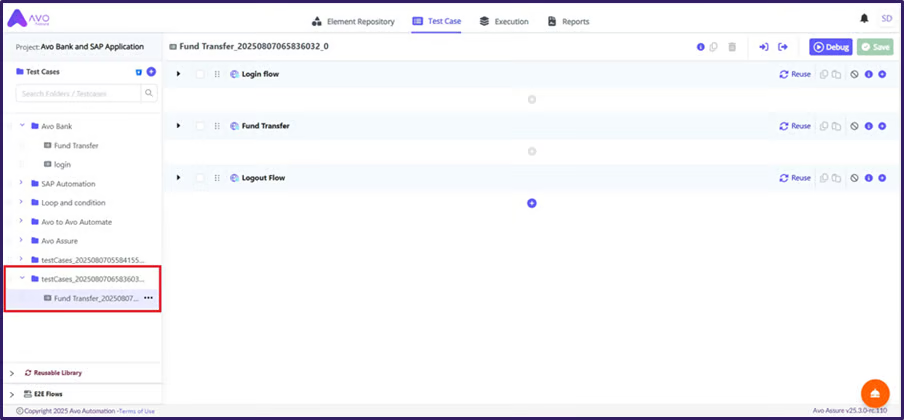
After some time, you can see the newly created Folder and data in the **Test Case** page.
Create testcase
To pull Test case by selecting **Create testcase** option, perform the following actions:
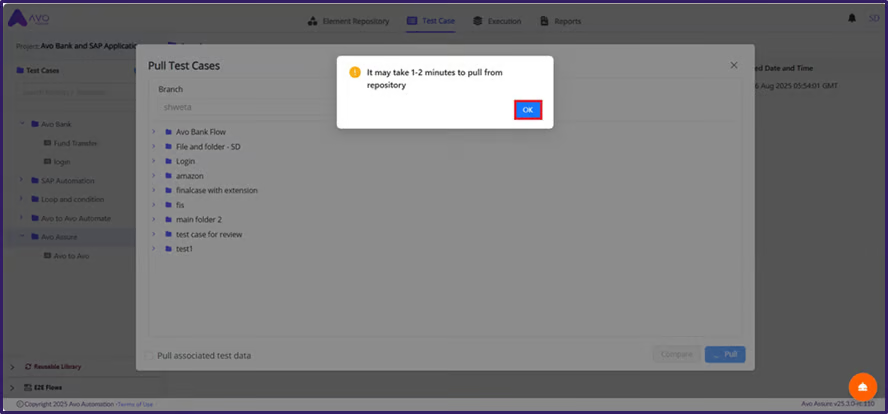
1. A dialog box appears with the message: **It may take 1–2 minutes to pull from repository**.
2. Select **OK** button to proceed.
After some time, you can see the newly created Test case in the **Test Case** page.
Create Folder
To pull Test case by selecting **Create Folder** option, perform the following actions:
1. A dialog box appears with the message: **It may take 1–2 minutes to pull from repository.**
2. Select **OK** button to proceed.
After some time, you can see the newly created Test case in the **Test Case** page.
{% hint style="info" %}
**Note**: The following information applies only to the **Test Case** page.
* This information explains how data is pulled from the Bitbucket repository.
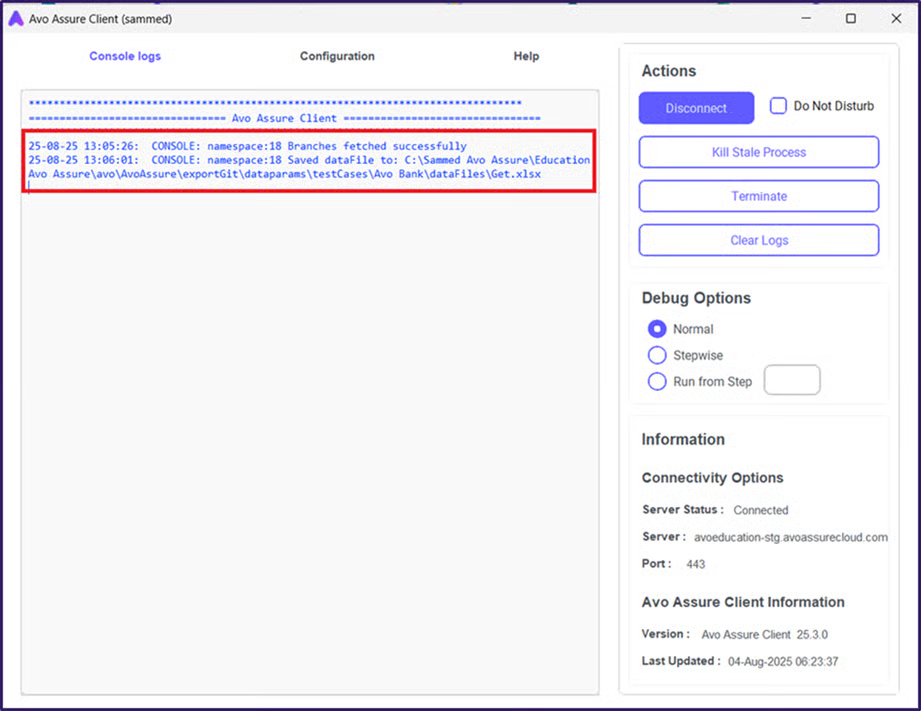
* When a Test case includes associated Test Data (for example, an Excel file), selecting the Test case pulls both the Test case and the data file.
* After the pull operation, the Test case appears in the **Test Case** page, and the data file is saved in the Avo Assure Client folder. The Avo Assure Client console displays the file path.
* To use the pulled data file, update the file path in the Test case to match the location of the pulled data file.
{% endhint %}
## Pulling Data Table from Bitbucket Repository
To pull Data Table from the Bitbucket Repository, perform the following actions:
1. On the **Home** page, under **Projects**, select the required **Project**.
2. From the **Settings** card, select the **Manage Integrations**.
3. Select **Test Data Management** page.
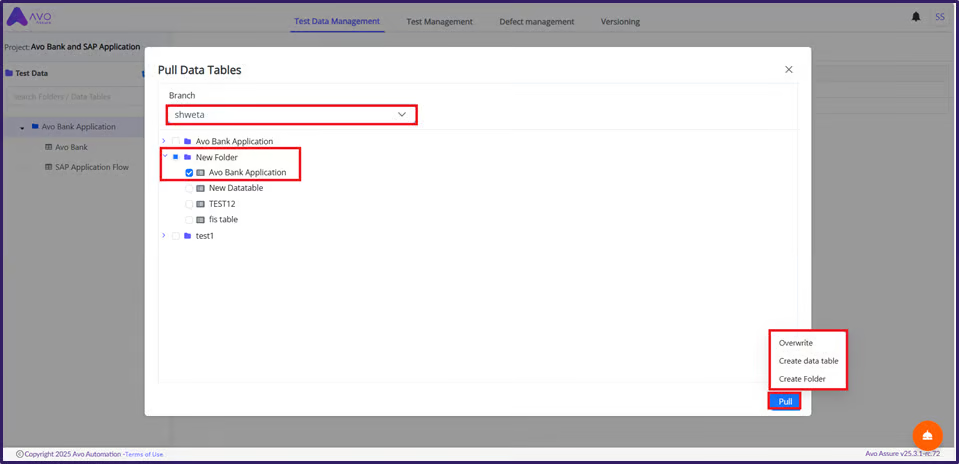
4. Select **Bitbucket** icon and select **Pull** method.
5. Search **Branch** and select appropriate Data Table Folder or Data Table.
6. Select **Pull** button, then you can see three options:
* **Overwrite**: When the **Overwrite** option is selected, the system restores the previous version of the Data Table folder to the current Data Table folder.
* **Create data table**: When the **Create data table** option is selected, the system creates a new Data Table inside the Data Table folder.
* **Create Folder**: When the **Create Folder** option is selected, the system creates a new folder in the Test Data Management tab and pulls all data into the newly created folder.
7. You can pull Data Table using the following options:
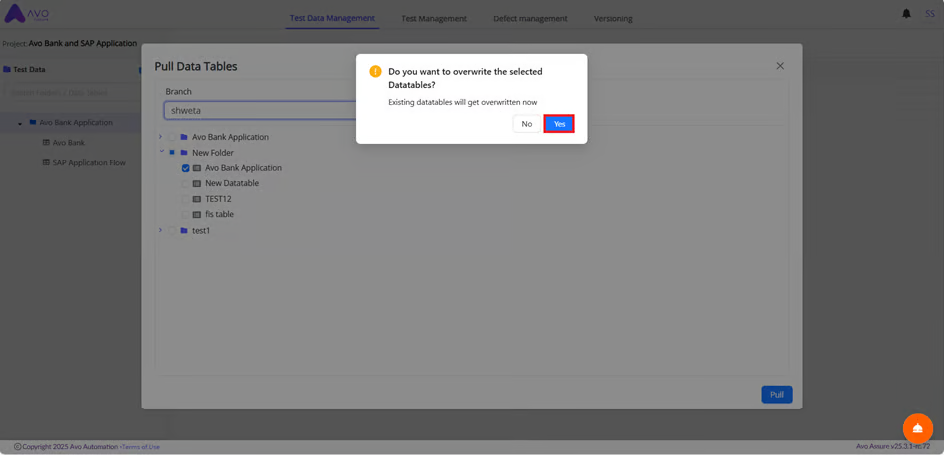
Overwrite
To pull Data Table by selecting **Overwrite** option, perform the following actions:
1. Select **Yes** button to restore the previous version of the Data Table Folder into the current Data Table Folder.
After some time, the you can see the previous version of the Data Table in the Data Table folder.
Create data table
To pull Data Table by selecting **Create data table** option, perform the following actions:
1. A dialog box appears with the message: **It may take 1–2 minutes to pull**.
2. Select **OK** button to proceed.
After some time, the you can see the previous version of the Data Table in the Data Table folder.
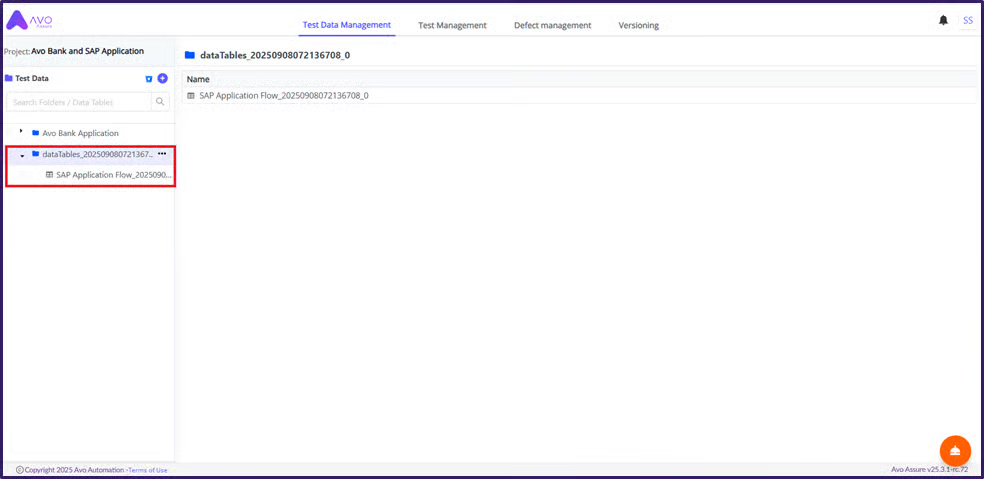
Create Folder
To pull Data Table by selecting **Create Folder** option, perform the following actions:
1. A dialog box appears with the message: I**t may take 1–2 minutes to pull**.
2. Select **OK** button to proceed.
After some time, the you can see the newly created Data Table Folder and Data Table in the **Test Data Management** page.